序言
在去年参加云栖大会的时候,从分享嘉宾的项目介绍中得知了SpringCloud,仅知道是当下比较火热的微服务解决方案,能为不同行业,不同领域提供更高效、更便捷、成本更低的服务;这次正好公司需要更换框架,所以自己非常荣幸能学习下伟大的SpringCloud。
SpringCloud版本
本次所有测试项目中Springboot版本为2.1.4.RELEASE,SpringCloud版本为Greenwich.SR1,JDK版本为1.8,集成环境为IntelliJ IDEA。
服务端注册
Spring cloud 为开发人员提供了快速构建分布式系统的一些工具,包括配置管理、服务发现、断路器、路由、微代理、事件总线、全局锁、决策竞选、分布式会话等等。运行环境简单,底层基于springboot,所以在下面开发之前,小编建议你具备两个概念,第一个是什么是springboot?springboot怎么运用?;第二个是什么叫微服务架构?
好了,闲话不多说了,切入主题,开始先来创建 eureka server。
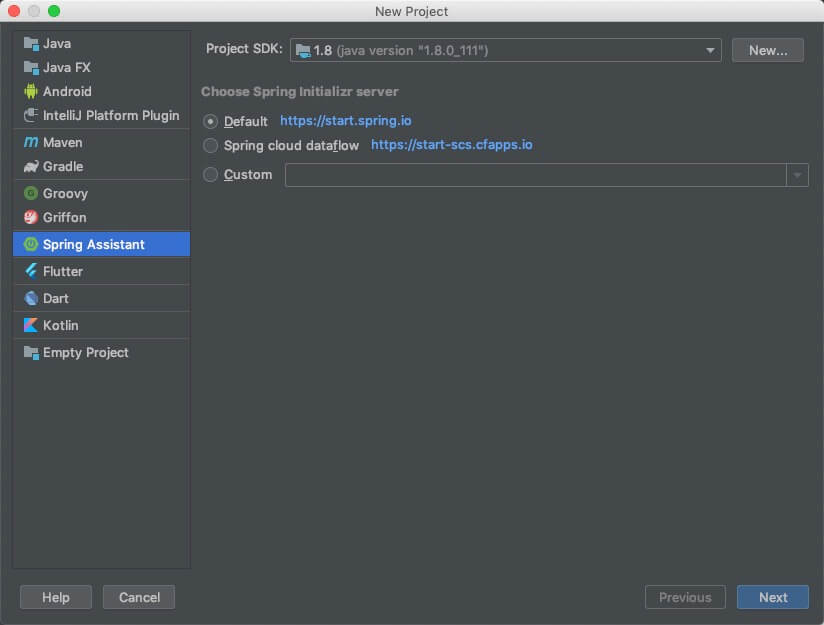
项目创建
打开IntelliJ,新建项目工程,选择Spring Assistant(若碰到没有Spring Assistant需要在IntelliJ的插件库中查询并安装即可)
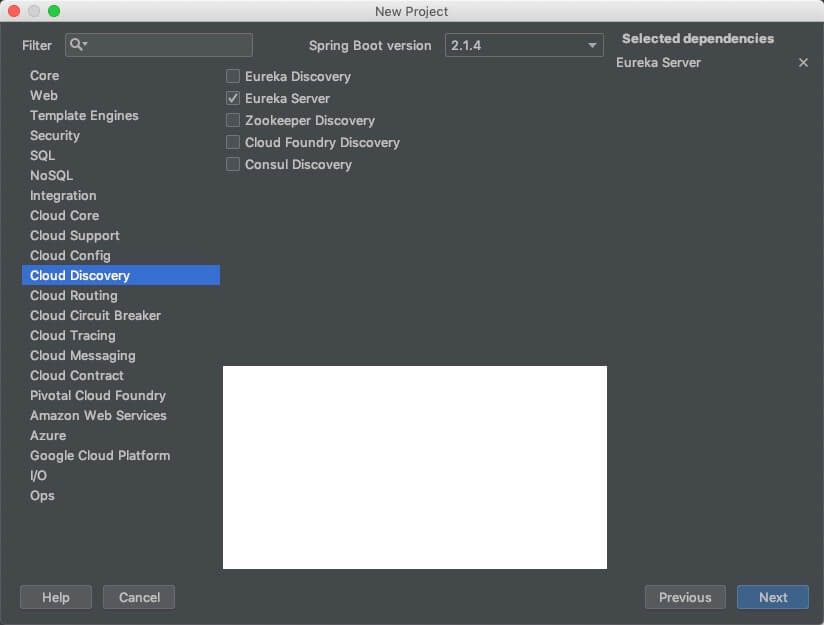
设置完项目属性后,选择Cloud Discovery,再勾选上Eureka Server,直接完成就可以了
启动服务
项目创建后,我们先来看下pom.xml,ide已经帮我们自动创建好项目的依赖
1 | <dependencies> |
这里主要依赖spring clound 和 spring-cloud-starter-netflix-eureka-server,接下来只需要配置下端口和服务名称就完工啦
注解配置
在启动类文件里面添加eureka server注解
1 |
|
端口、服务配置
在application.properties加上端口和服务配置
1 | server.port=8761 |
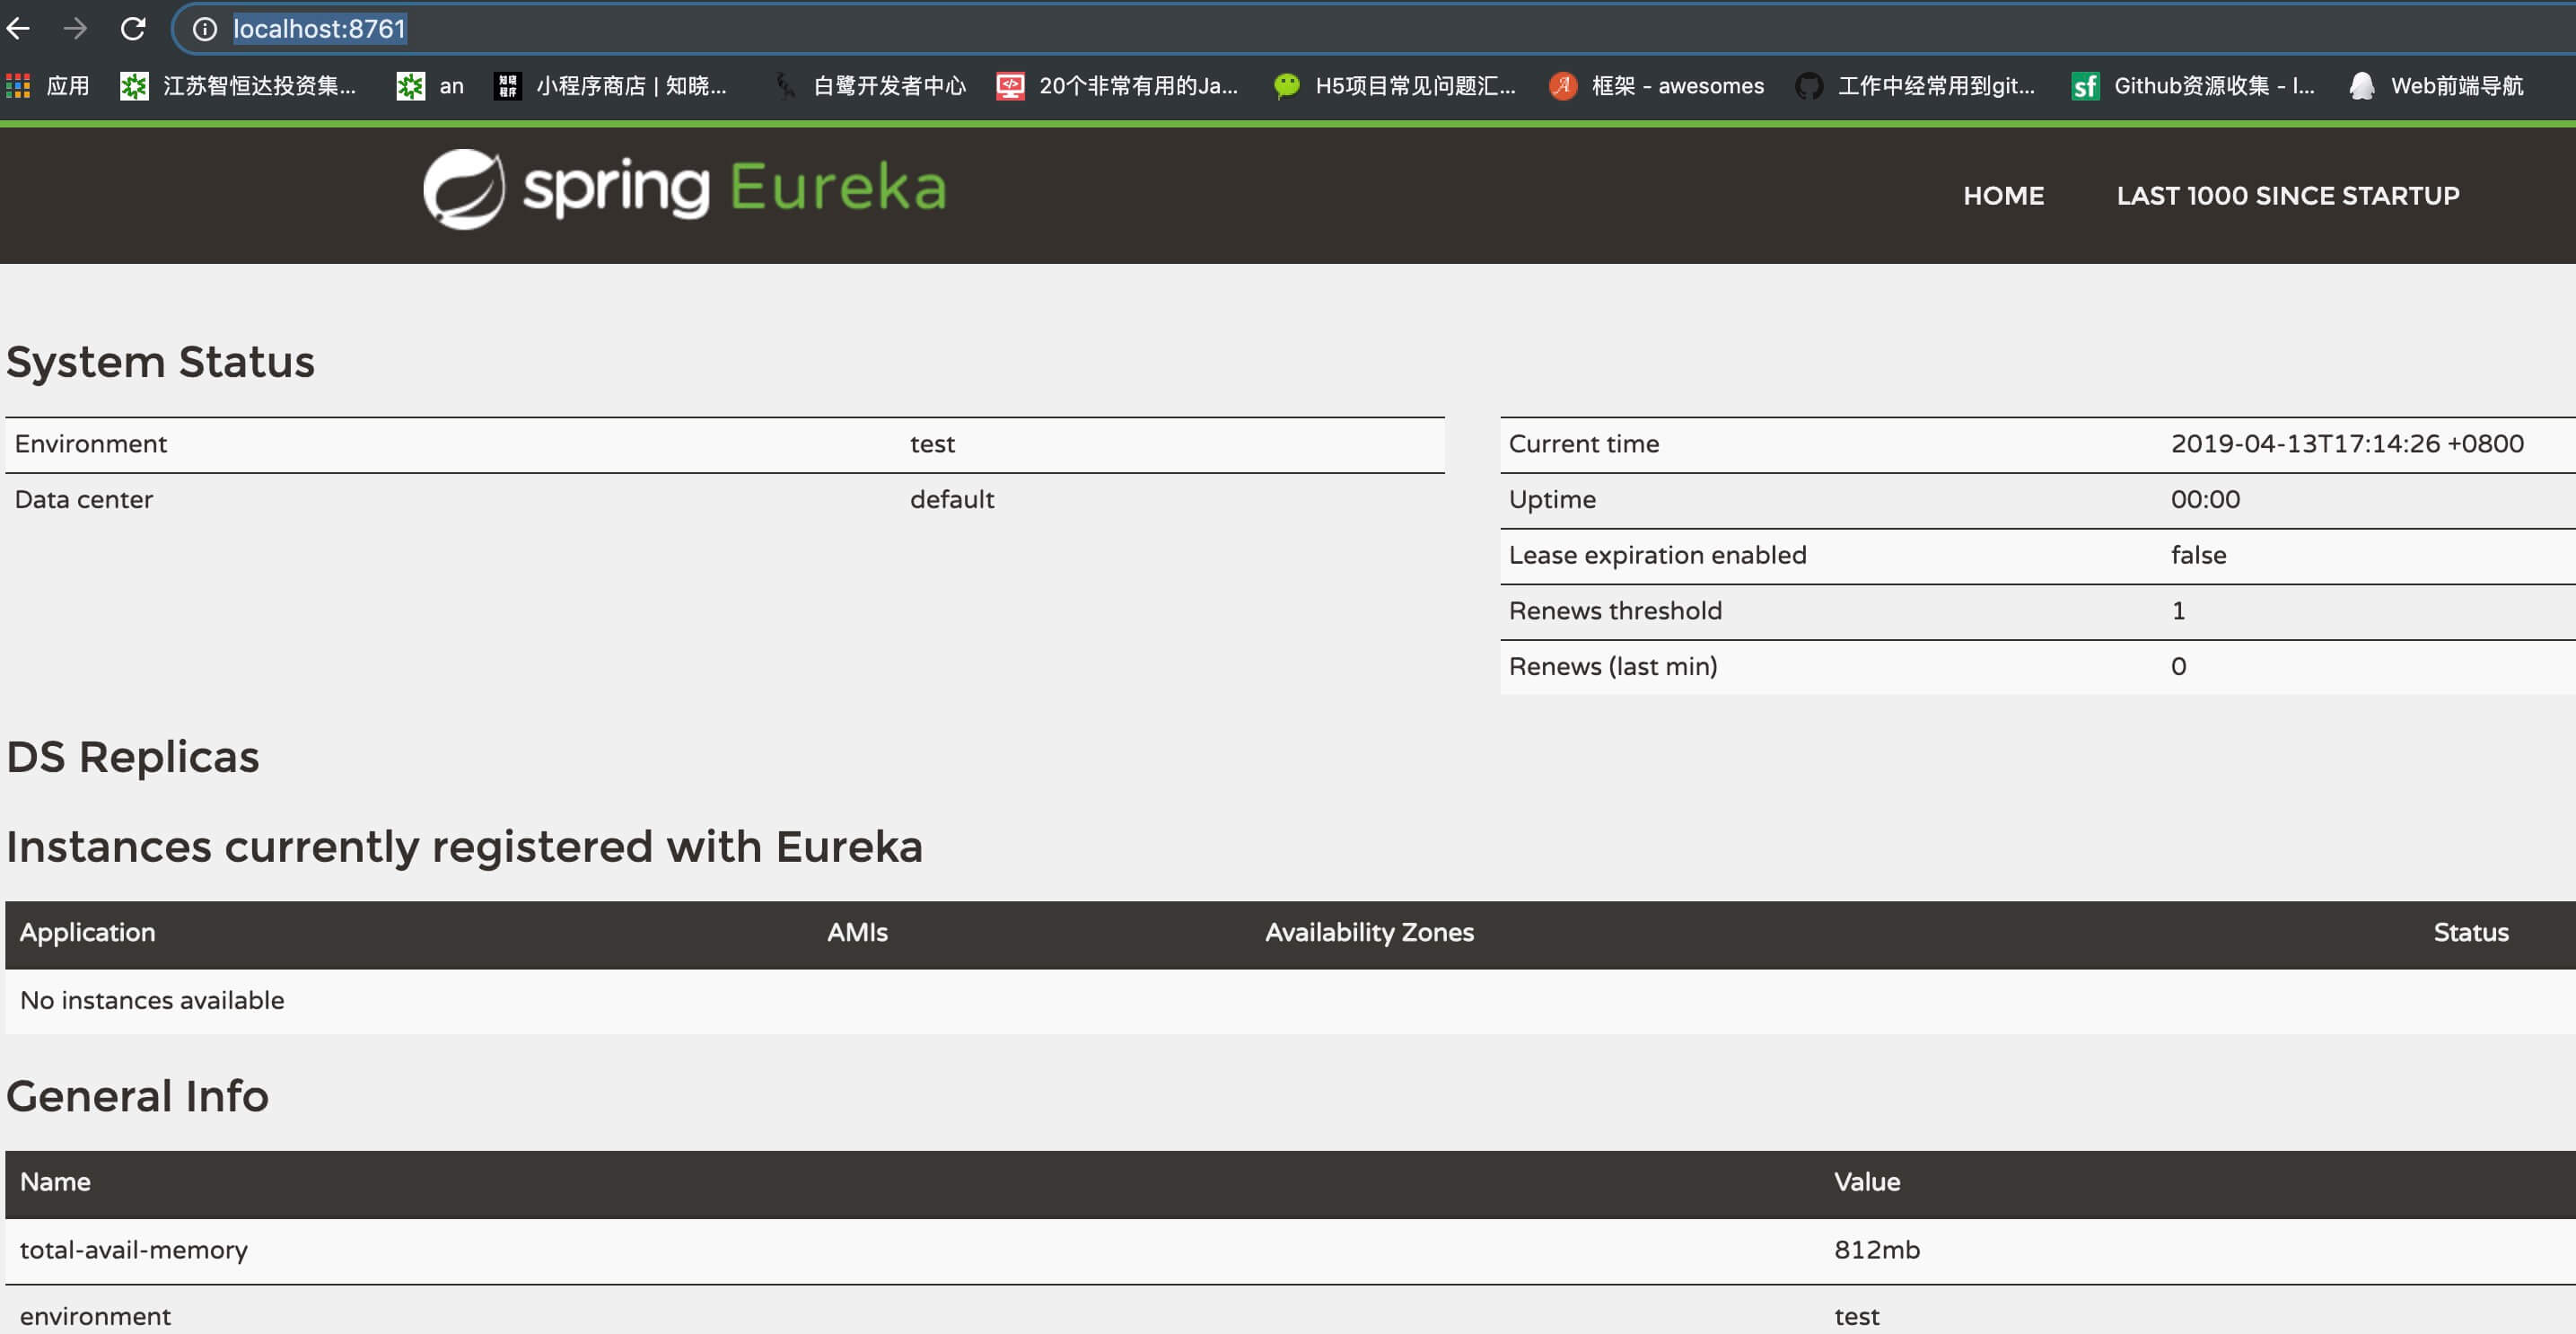
浏览访问
出现下图,代码你已经成功启动了Eureka Server ^_^
客户端注册
创建客户端
Eureka客户端与服务端只是依赖的jar包有所区别,其他都差不多
安装依赖
1 | <dependency> |
配置注解
启动类添加注解
1 |
|
配置端口、服务
同样application.properties里面配置端口和服务名称
1 | server.port=8762 |
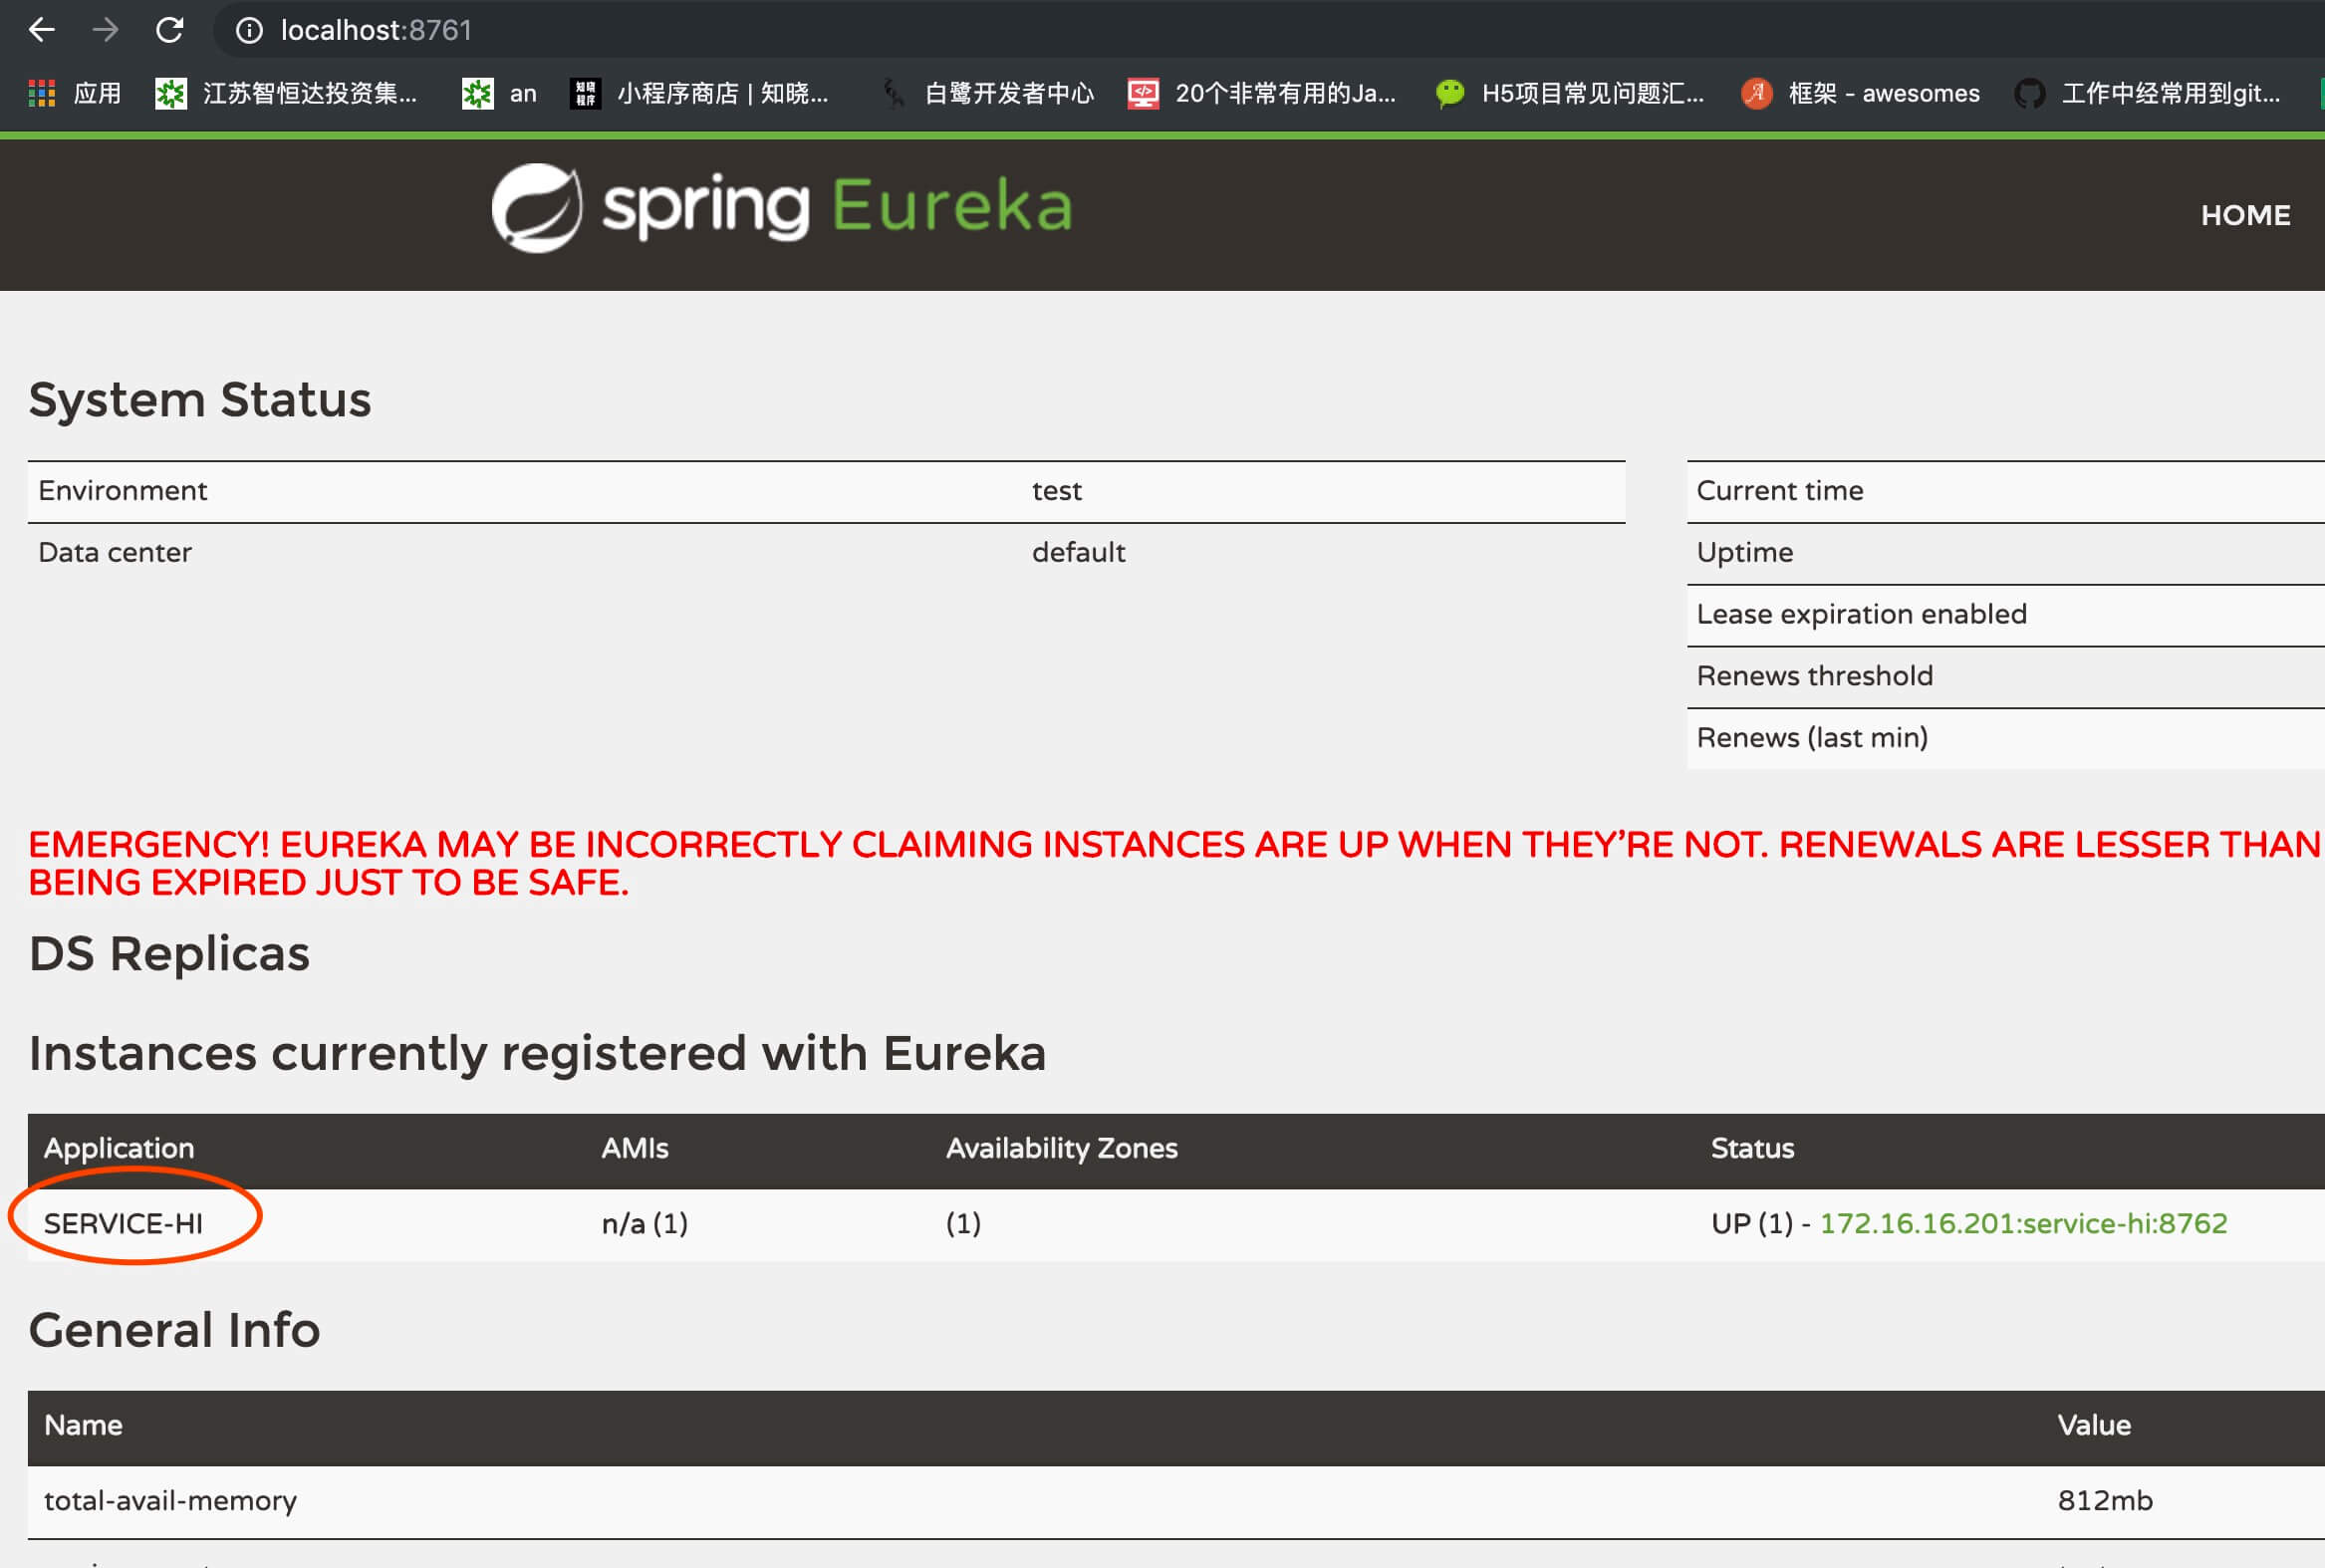
浏览访问
刷新之前服务窗口,你会惊奇的发现有个service-hi客户端服务了,出现下图效果,恭喜你第一章已经搞定啦^_^
项目示例地址
https://github.com/lenvonsam/spring-cloud-training/tree/master/chapter-one