序言
对于未接触过Linux系统的童鞋来说让你部署Mysql还是会有些坑要踩的,小编希望通过本章内容能帮助童鞋少踩坑,把时间更多地投入到实际项目业务中。
系统及软件环境
本次演示操作系统和软件版本环境如下(系统是纯净的,没有任何软件的安装):
- 操作系统:Linux localhost.localdomain 3.10.0-957.10.1.el7.x86_64 #1 SMP Mon Mar 18 15:06:45 UTC 2019 x86_64 x86_64 x86_64 GNU/Linux
- Mysql版本:Mysql,5.7.26
Tips:
查看Linux系统命令1
[root@localhost]$ uname -a
安装Mysql
1 | [root@localhost]$ yum -y update |
进入Mysql
生成初始密码
1 | [root@localhost]$ grep "password" /var/log/mysqld.log |
通过root进入mysql
1 | [root@localhost]$ mysql -u root -p |
修改mysql的root用户密码
1 | $ alter user 'root'@'localhost' identified by 'your password'; |
测试登录
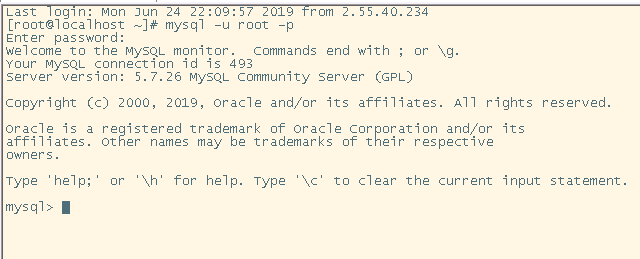
看到上图结果,表明已成功安装mysql啦 ^_^
远程访问
设置数据库访问权限
用root用户登录mysql1
2
3$ mysql -u root -p
$ grant all privileges on *.* to 'root'@'%' identified by 'your password';
$ flush privileges;防火墙设置
纯净的Linux对方的端口需要手动开放的1
2[root@localhost]$ firewall-cmd --permanent --zone=public --add-port=3306/tcp
[root@localhost]$ firewall-cmd --reload
Tips:
命令含义
– zone (作用域)
– add-port=3306/tcp (添加端口,格式为:端口/通讯协议)
– permanent (永久生效)
数据字符集设置
Mysql默认的是latin1字符集,但在实际开发过程中一般是utf8,所以需要修改my.cnf文件(默认路径:/etc/my.cnf)1
2
3
4[client]
default-character-set=utf8
[mysqld]
character-set-server=utf8
保存文件,重启数据库,即可生效1
[root@localhost]$ systemctl restart mysqld
更改访问端口
Mysql默认端口号是3306,但有时候实际业务需要我们更改访问端口(示例为8778),所以需要修改my.cnf文件1
2[mysqld]
port=8778
保存文件,重启数据库,即可生效
外部数据导入
- 通过navicat或其他sql工具导出的sql文件导入Mysql(整库)
用root管理员登入mysql
1
$ mysql -u root -p
选择需要导入数据的数据库databaseA
1
$ use databaseA;
用source命令进行外部sql文件导入
1
2# 示例的文件路径在/app根目录下
$ source /app/example.sql;
- 导入csv文件(单表)
- 确保.csv编码格式正确,导入格式要为ANSI编码格式
- 选择对应的数据库,然后找到对应的表进行数据导入
1
2$ use databaseA;
$ load data infile '/app/user.csv' into table user fields terminated by ',' optionally enclosed by '"' escaped by '"' lines terminated by '\r\n';
Tips:
Mysql5.7针对于权限这块控制比较严格,对于外来的文件会有格式、权限的校验,为了解决这个问题,需要在my.cnf里面添加如下配置1
2[mysqld]
secure-file-priv=""
保存文件,重启服务,即可解决
常见问题
忘记root密码
修改my.cnf文件
1
2[mysqld]
skip-grant-tables重启mysql
1
[root@localhost]$ systemctl restart mysqld
用户无密码登录,并修改root密码
1
2
3
4$ mysql -u root -p
$ use mysql;
$ update user set authentication_string=password('your password') where user='root';
$ flush privileges;再找到my.cnf,删除skip-grant-tables,然后再重启服务
ERROR 2002 (HY000): Can’t connect to local MySQL server through socket ‘/var/lib/mysql/mysql.sock’
1 | [root@localhost]$ systemctl start mysqld |
系统开机自启MySQL
1 | [root@localhost]$ systemctl enable mysqld |
有的时候对于特殊字符需要utf8mb4格式的字符集,就需要创建对应的数据库
1 | $ create database dbname default character set utf8mb4 collate utf8mb4_unicode_ci; |